- Contact Us
-
Your location
Pialba QLD 4655
Your nearest store is
Hervey Bay
-
Products
Our products
Patio & Outdoor Living See all
Louvre Lighting Outdoor BlindsOutdoor KitchensAll Patio & Outdoor LivingGarages, Sheds & Shed Storage See all
Cyclonic Sheds Flat Roof Sheds & Garages Gable Roof Sheds & GaragesIndustrial & Rural ShedsUmbra Awning Sheds All Garages, Sheds & Shed StorageFencing, Gates & Screening See all
All Fencing, Gates & ScreeningGift CardsMining Outdoor KitchensLawn & Garden See all
All Lawn & GardenSale Clearance All Products - Specials
- Stores
-
About
Stratco is one of the largest producers and marketers of quality building and home improvement products in Australia with a network of stores throughout the country.
- Trade
- Specifiers
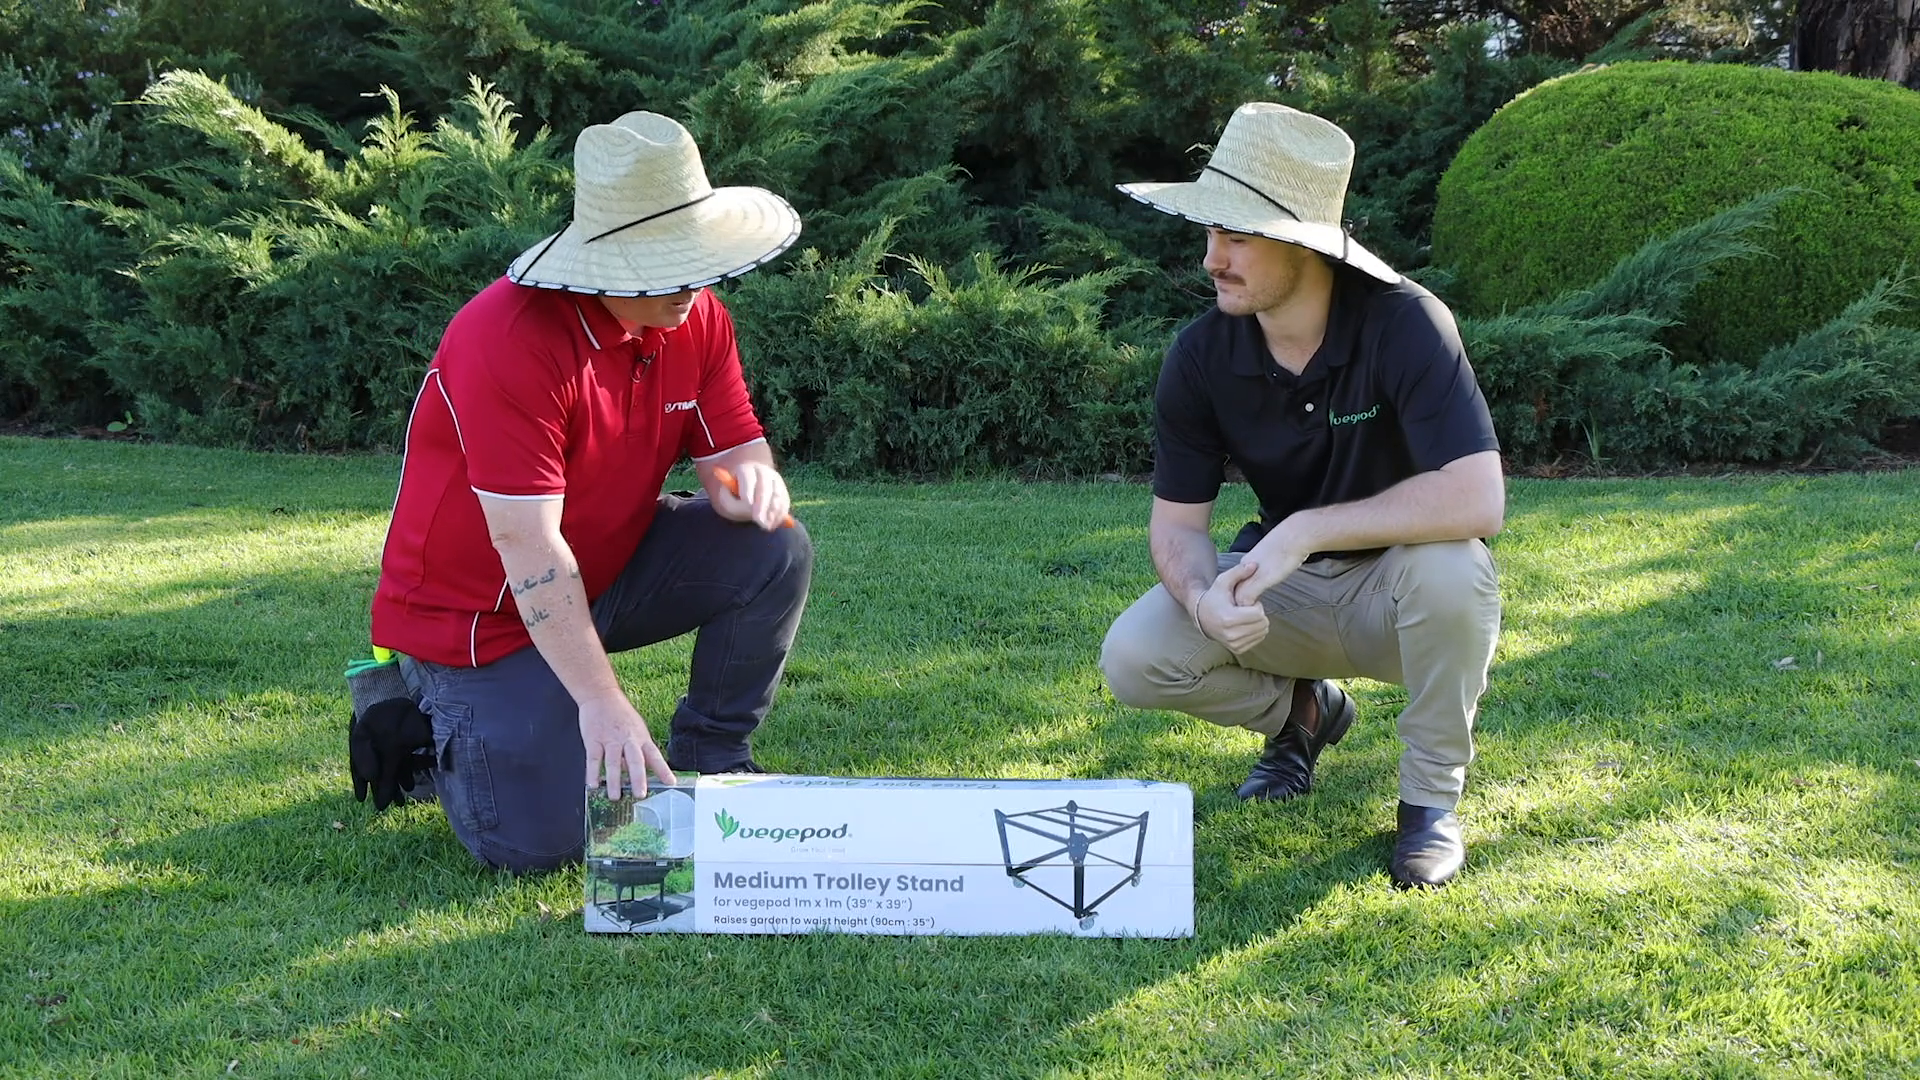
HowTo Assemble And Plant Your Vegepod
If you're interested in growing your own vegetables but struggle with space or time, the Vegepod might be the perfect solution for you. This raised self-watering garden bed simplifies the process of vegetable gardening, making it accessible to everyone. In this guide, we will walk you through each step of assembling and planting your Vegepod, ensuring you have everything you need for a successful growing season.
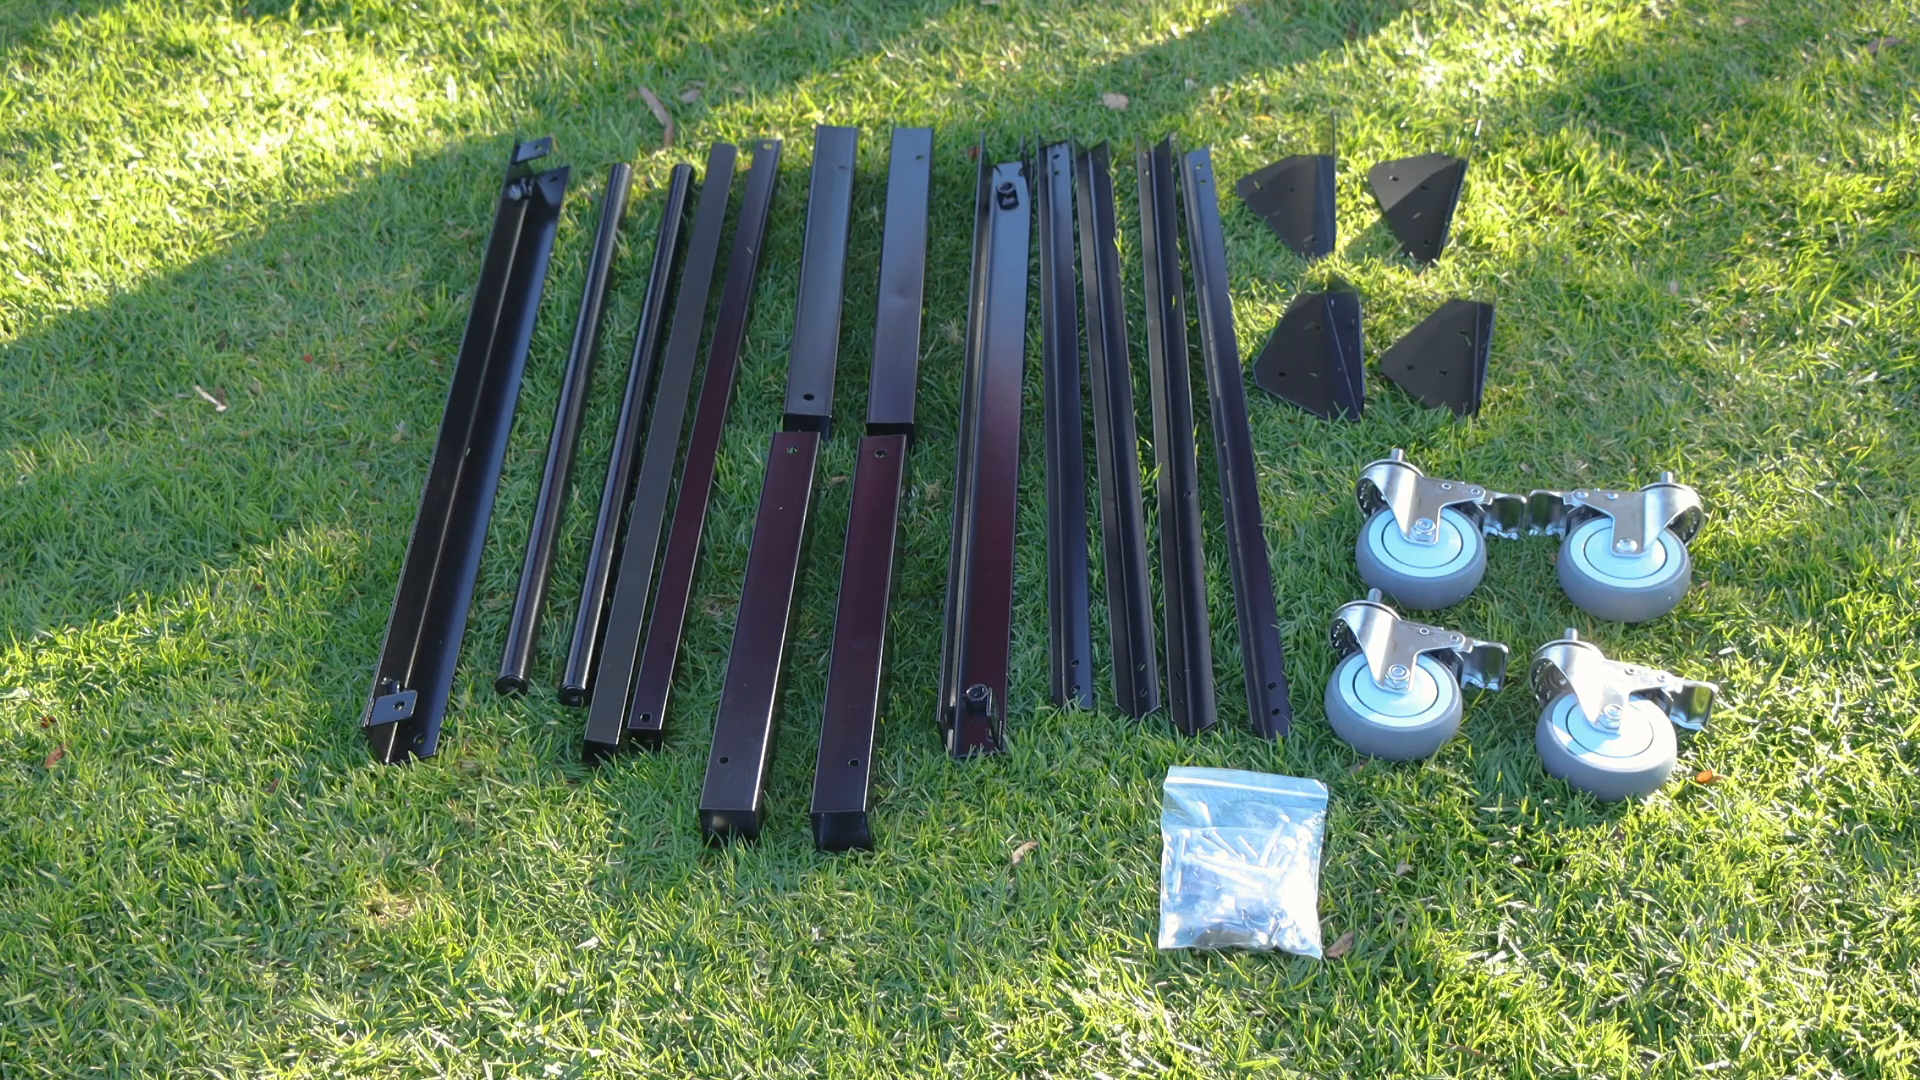
Step 1: Gather Your Materials
Before you begin, make sure you have all the necessary materials. The medium Vegepod trolley stand and medium Vegepod kit comes with:
- Vegepod trolley
- Cross braces
- Side braces
- Wheels
- Wall components
- Wicking trays
- Veggie cover
- Irrigator
- Zip ties
- Bolts and screws
- Allen key
Additionally, you will need soil, perlite, your choice of vegetable plants, gardening gloves, a face mask, and sun protection if working outside.
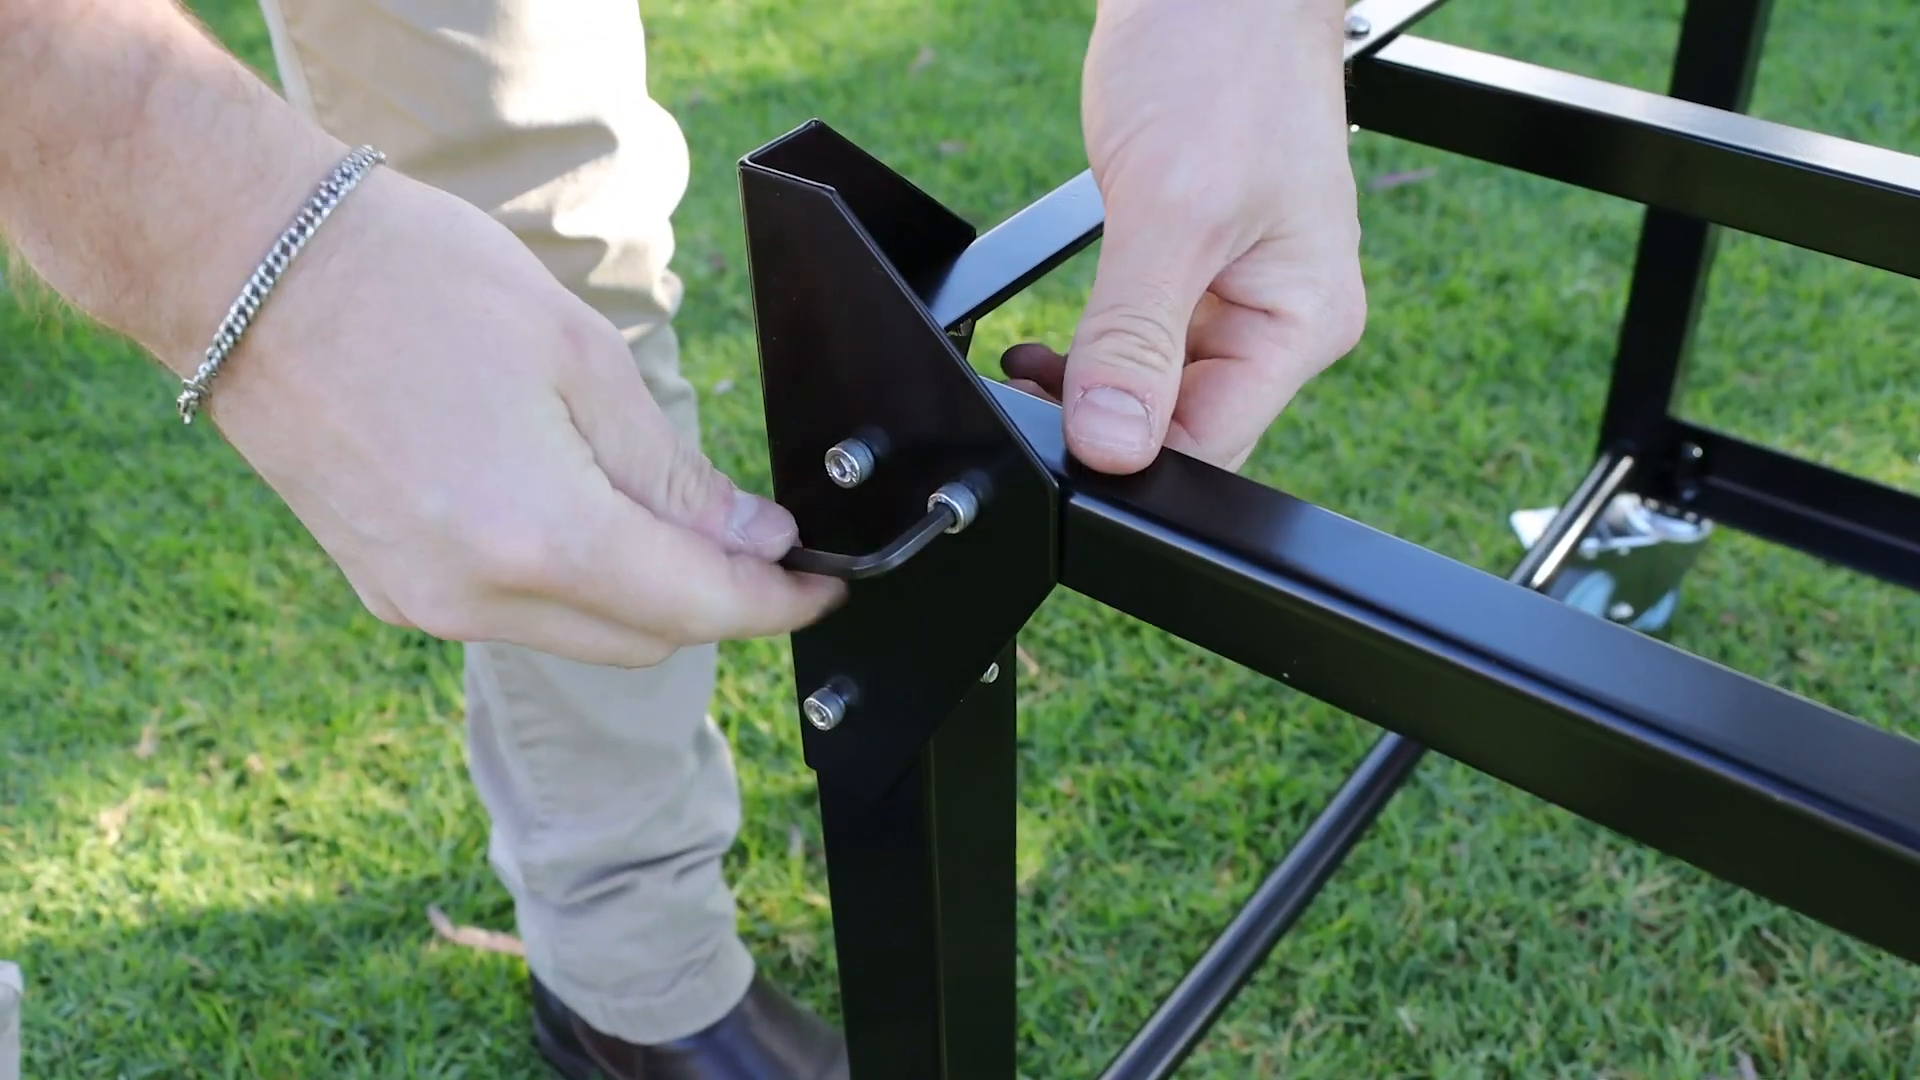
Step 2: Assemble the Trolley
Start by flipping the Vegepod trolley upside down. Begin with the cross brace, using the rounded head bolts to secure it from underneath. Initially, tighten them just by hand. Once everything is in place, you will tighten them fully at the end of the assembly process.
Next, attach the side braces, which will provide support for the legs. Make sure that the holes in the braces are aligned and facing each other. Once these are secure, proceed to set up the cross braces for the wheels. Ensure that the bar on the back of the wheels is on the outside before locking them down.
Step 3: Secure All Nuts and Bolts
After attaching all the necessary components, flip the trolley back to its upright position. This is the crucial step where you should tighten every nut and bolt securely. This ensures stability for your Vegepod.
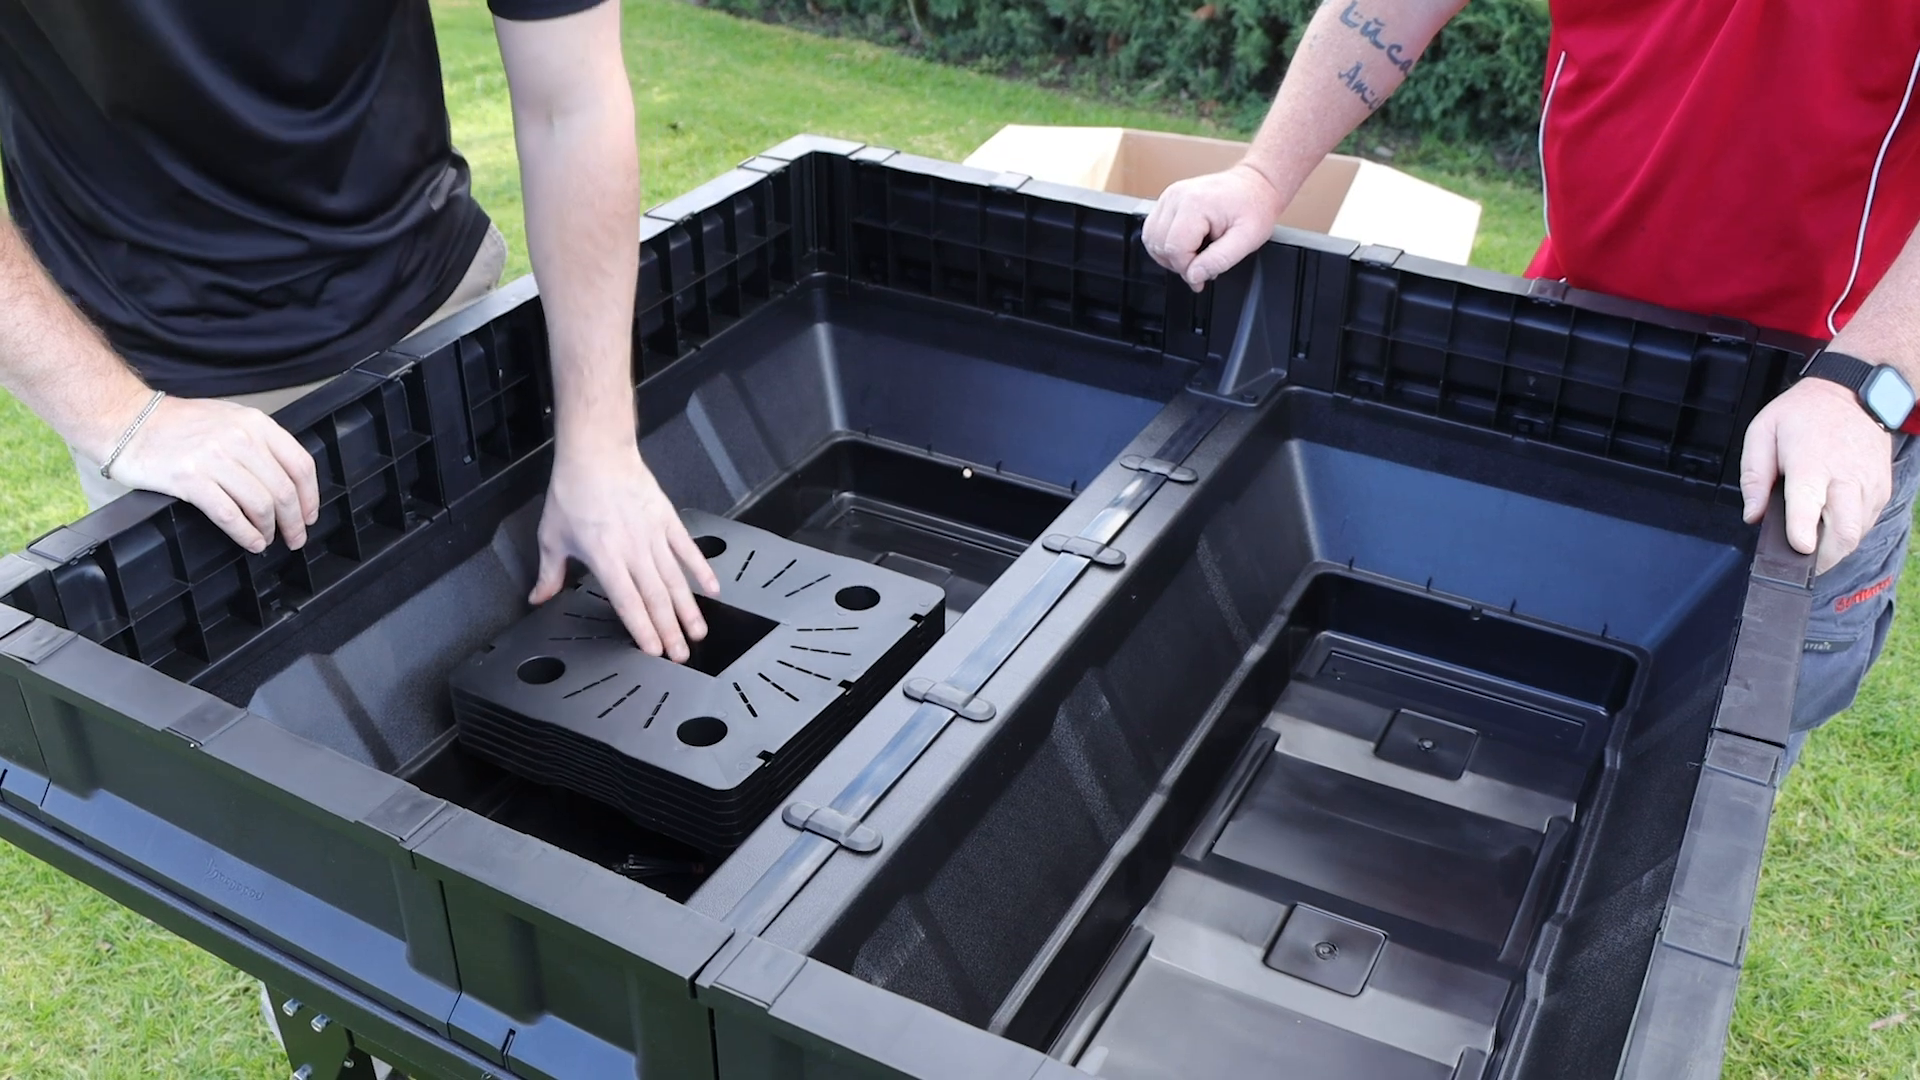
Step 4: Prepare the Vegepod Base
Now it's time to prepare the actual Vegepod. The medium-sized pod is versatile and fits perfectly in most spaces, including balconies and backyards. It requires approximately 220L of soil and 50L of perlite.
Position the pod on top of the trolley with the release holes facing outwards at the back. These holes allow excess water to drain, preventing overwatering. Begin attaching the walls by snapping them together, ensuring the smooth side is facing outward. The walls should click into place easily.
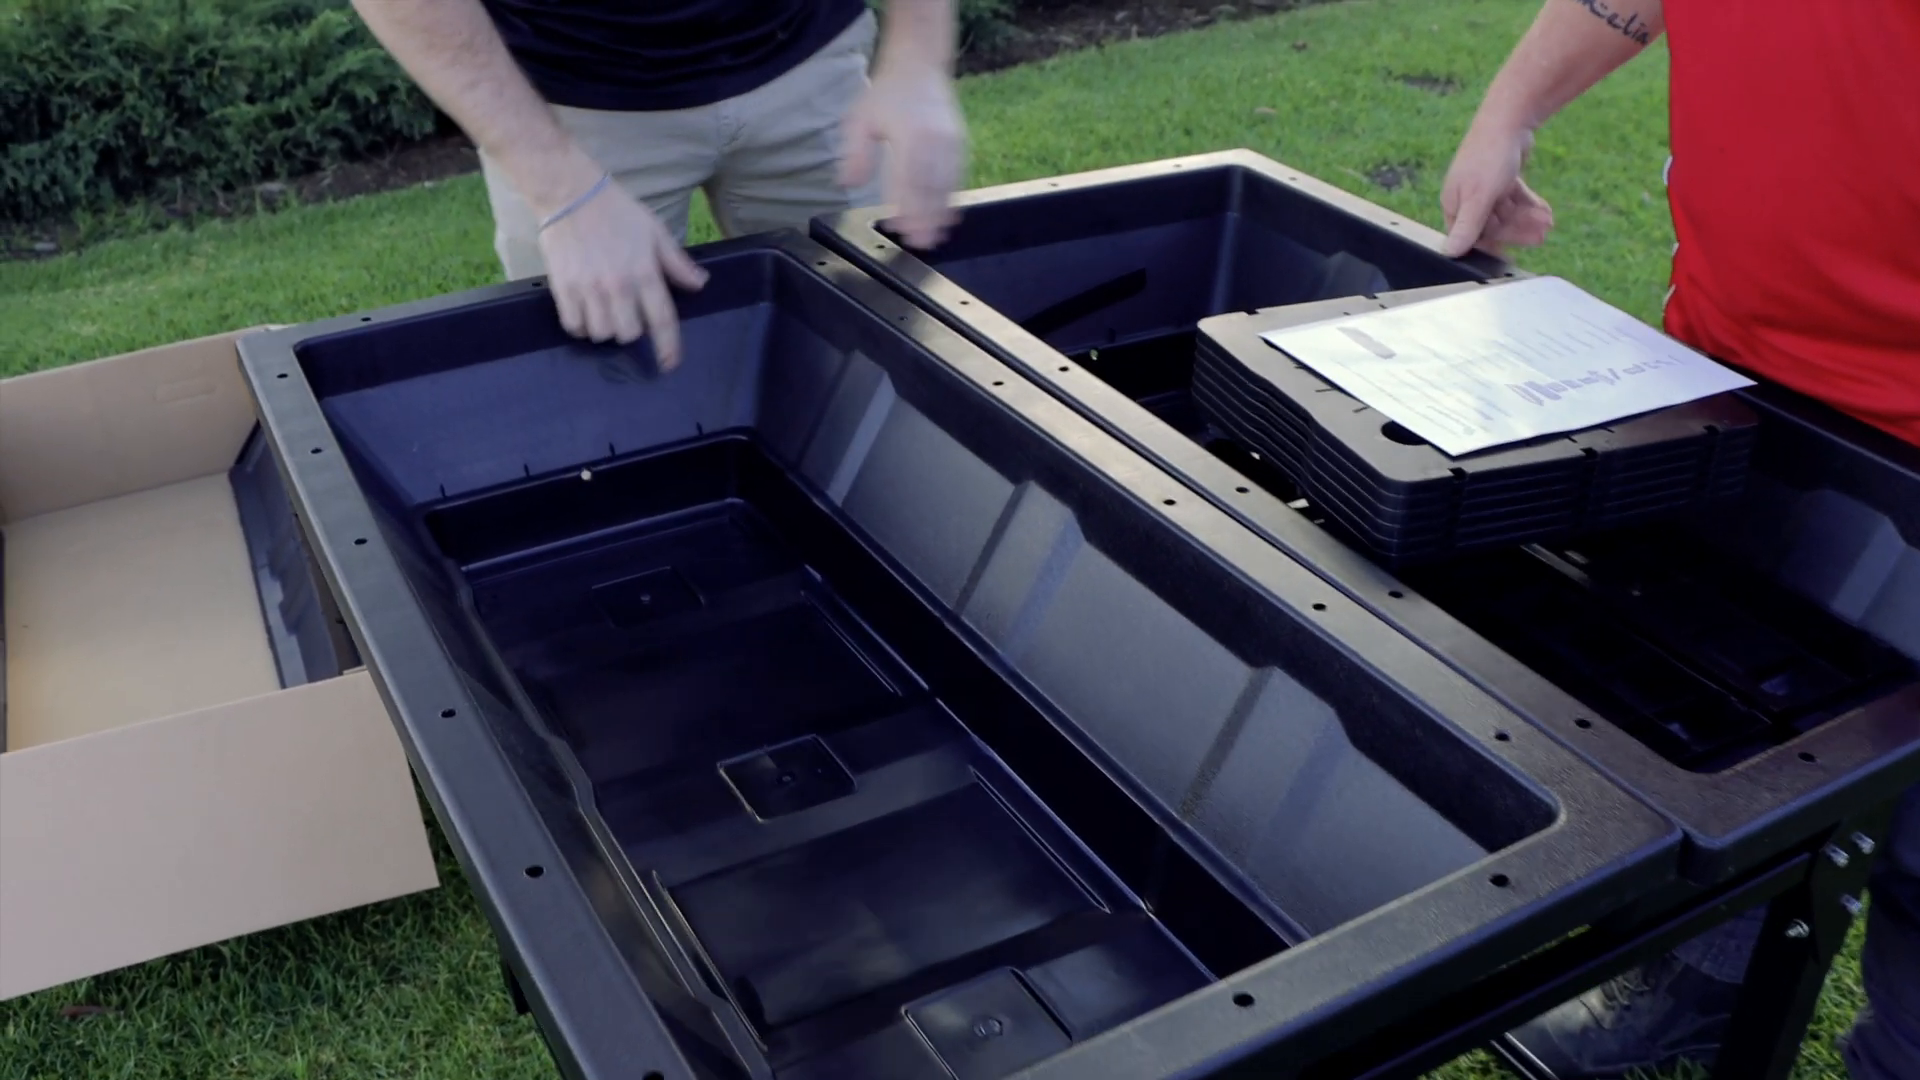
Step 5: Install the Wicking Trays
Once the walls are secure, it’s time to install the wicking trays. These trays are essential for the self-watering feature of the Vegepod. They will be placed at the bottom, allowing water to seep through the soil above, providing moisture to the roots below.
Place three wicking trays in the base. This system allows for osmosis, meaning your plants can go for two to three weeks without needing additional watering.
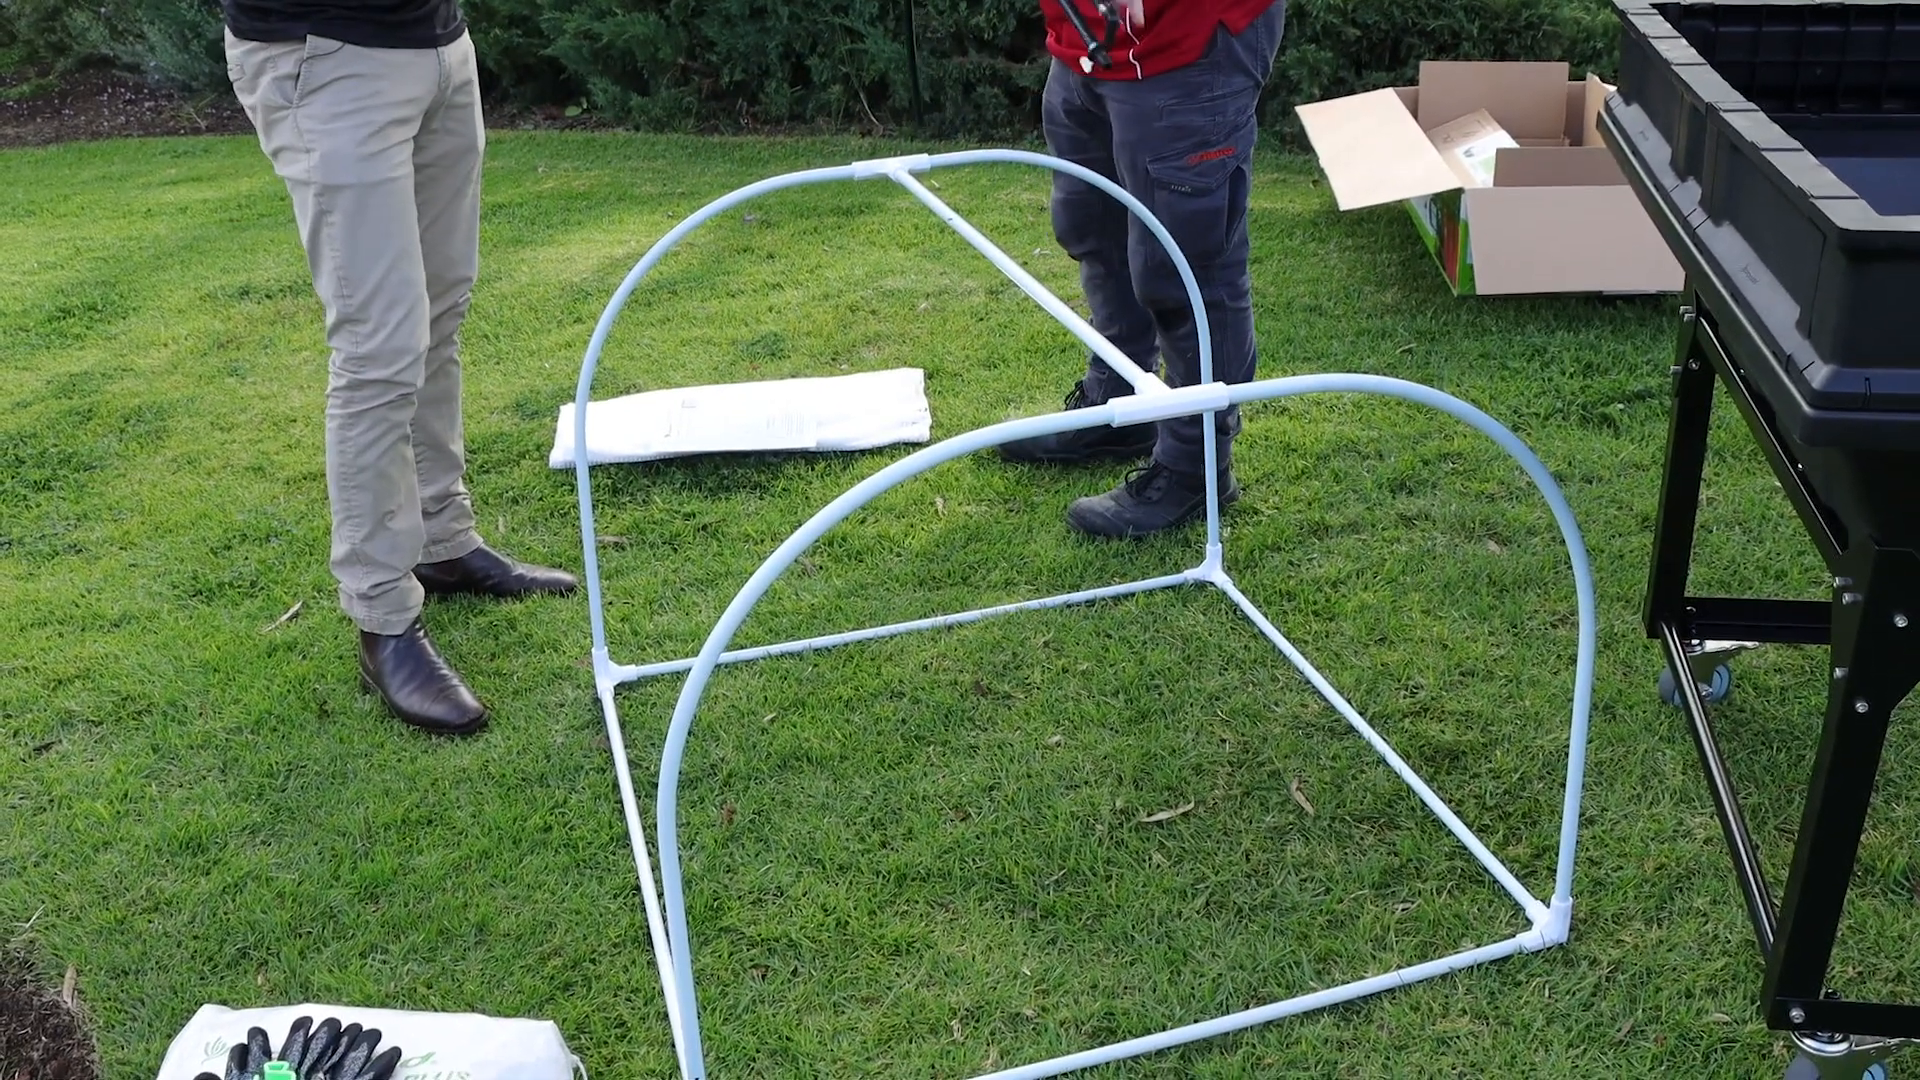
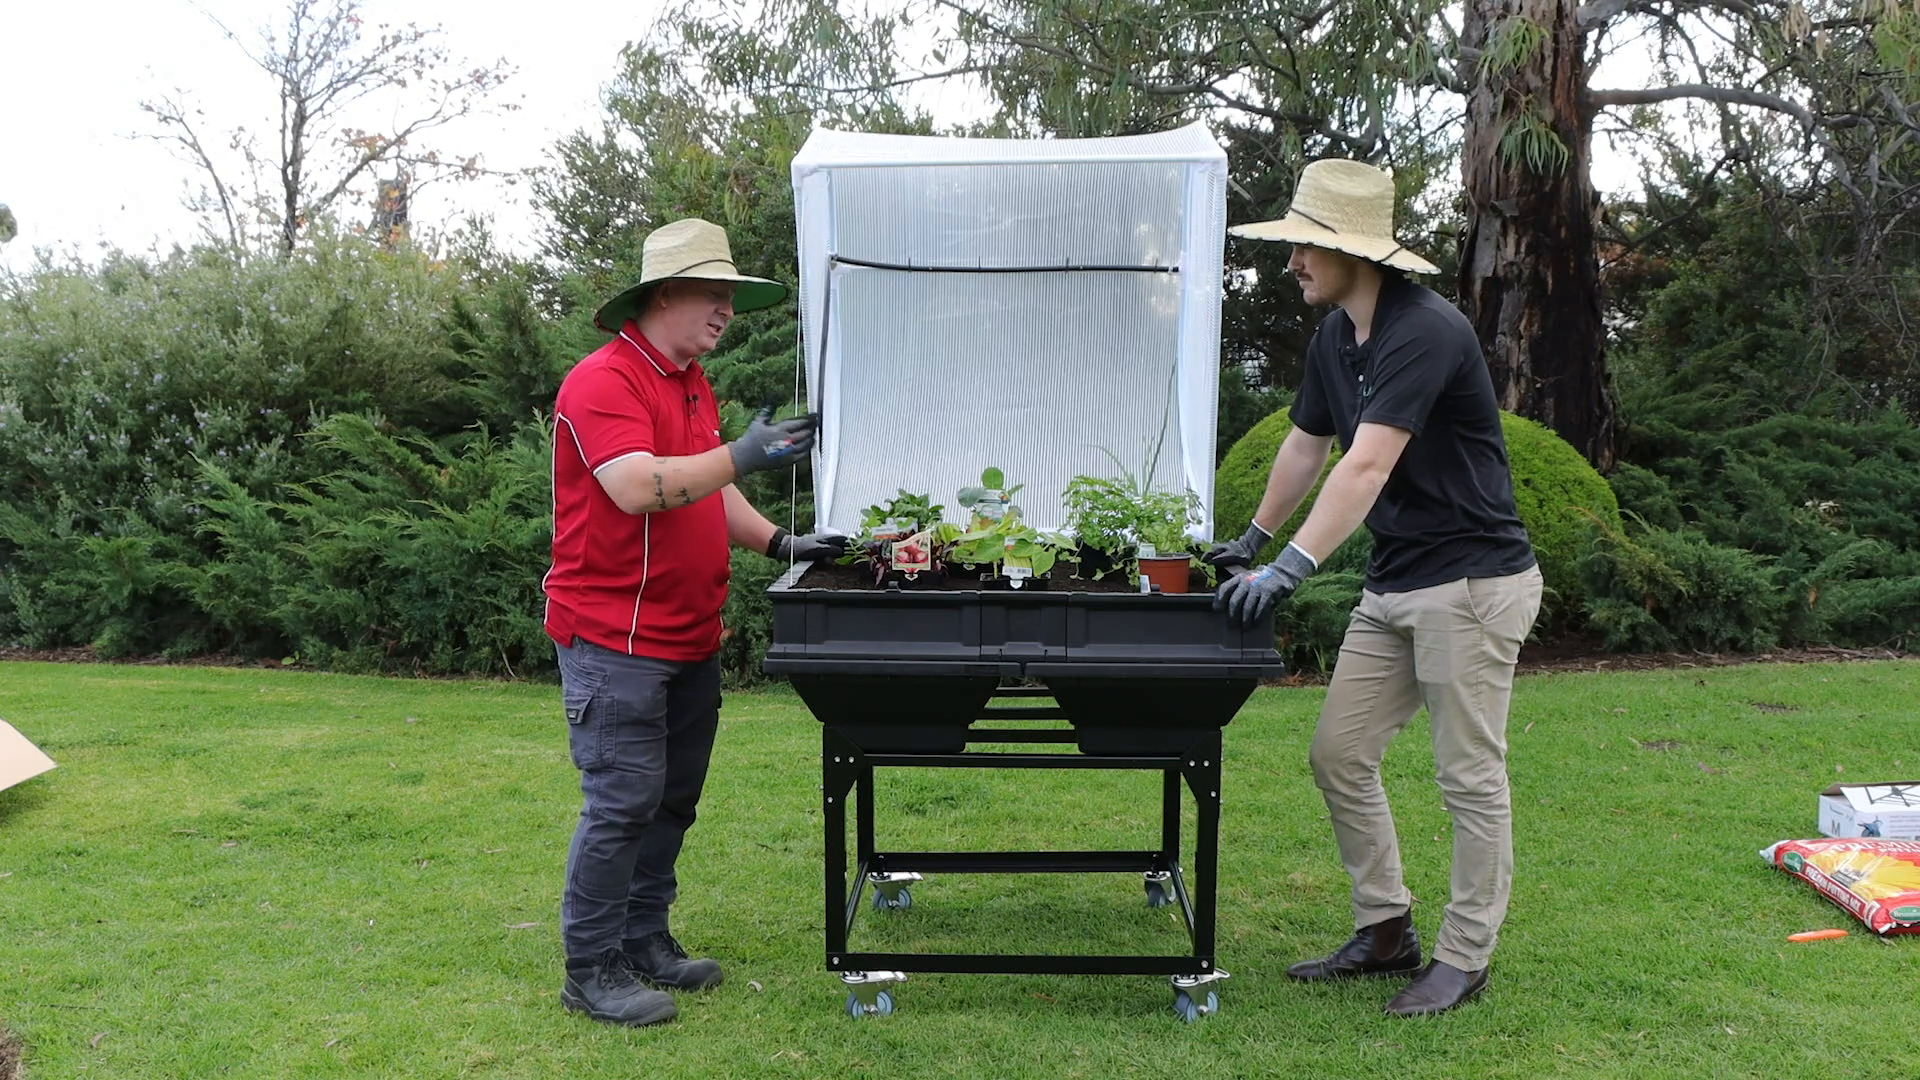
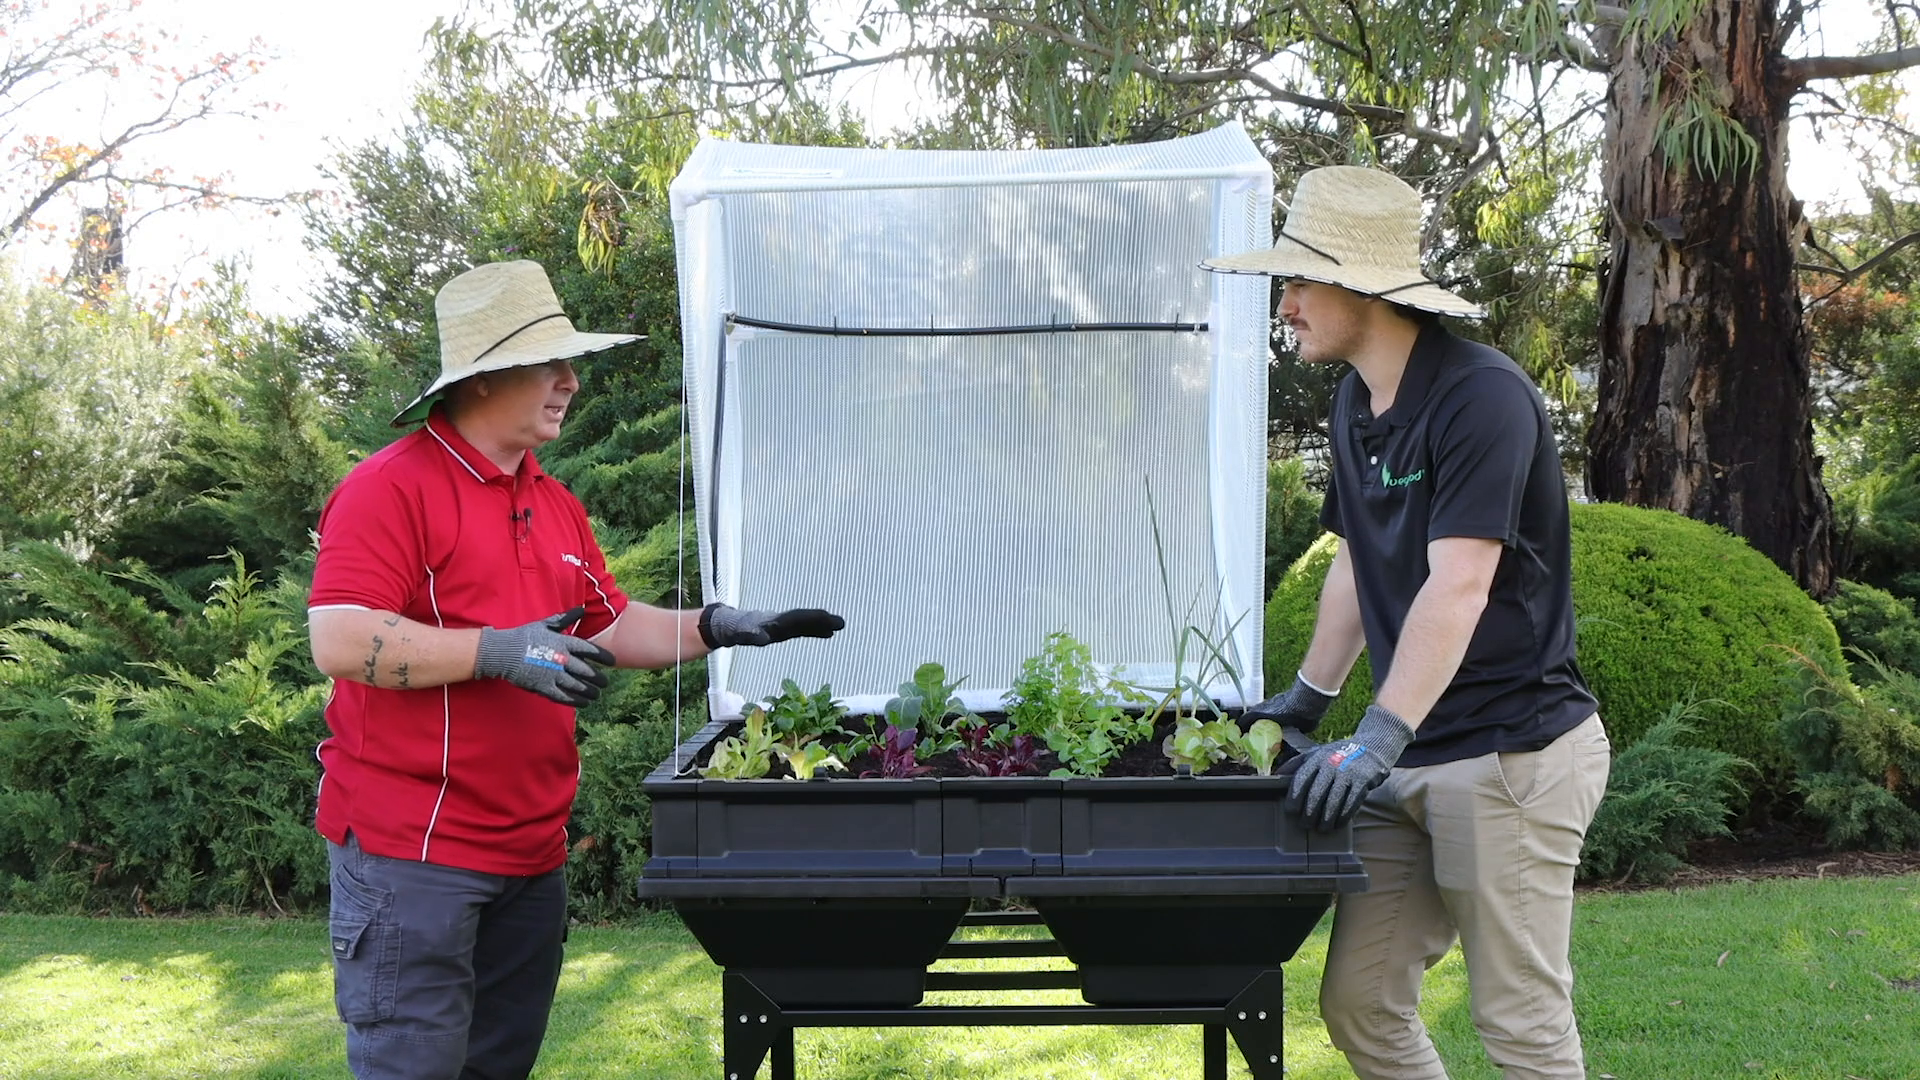
Step 6: Set Up the Veggie Cover
To protect your plants from pests and harsh weather, it’s important to install the veggie cover. Carefully open the packaging and avoid cutting too deeply to prevent creating holes for pests to enter.
Insert the hoops into the designated holes on the cover, ensuring they're facing upwards. This will create a protective dome over your plants.
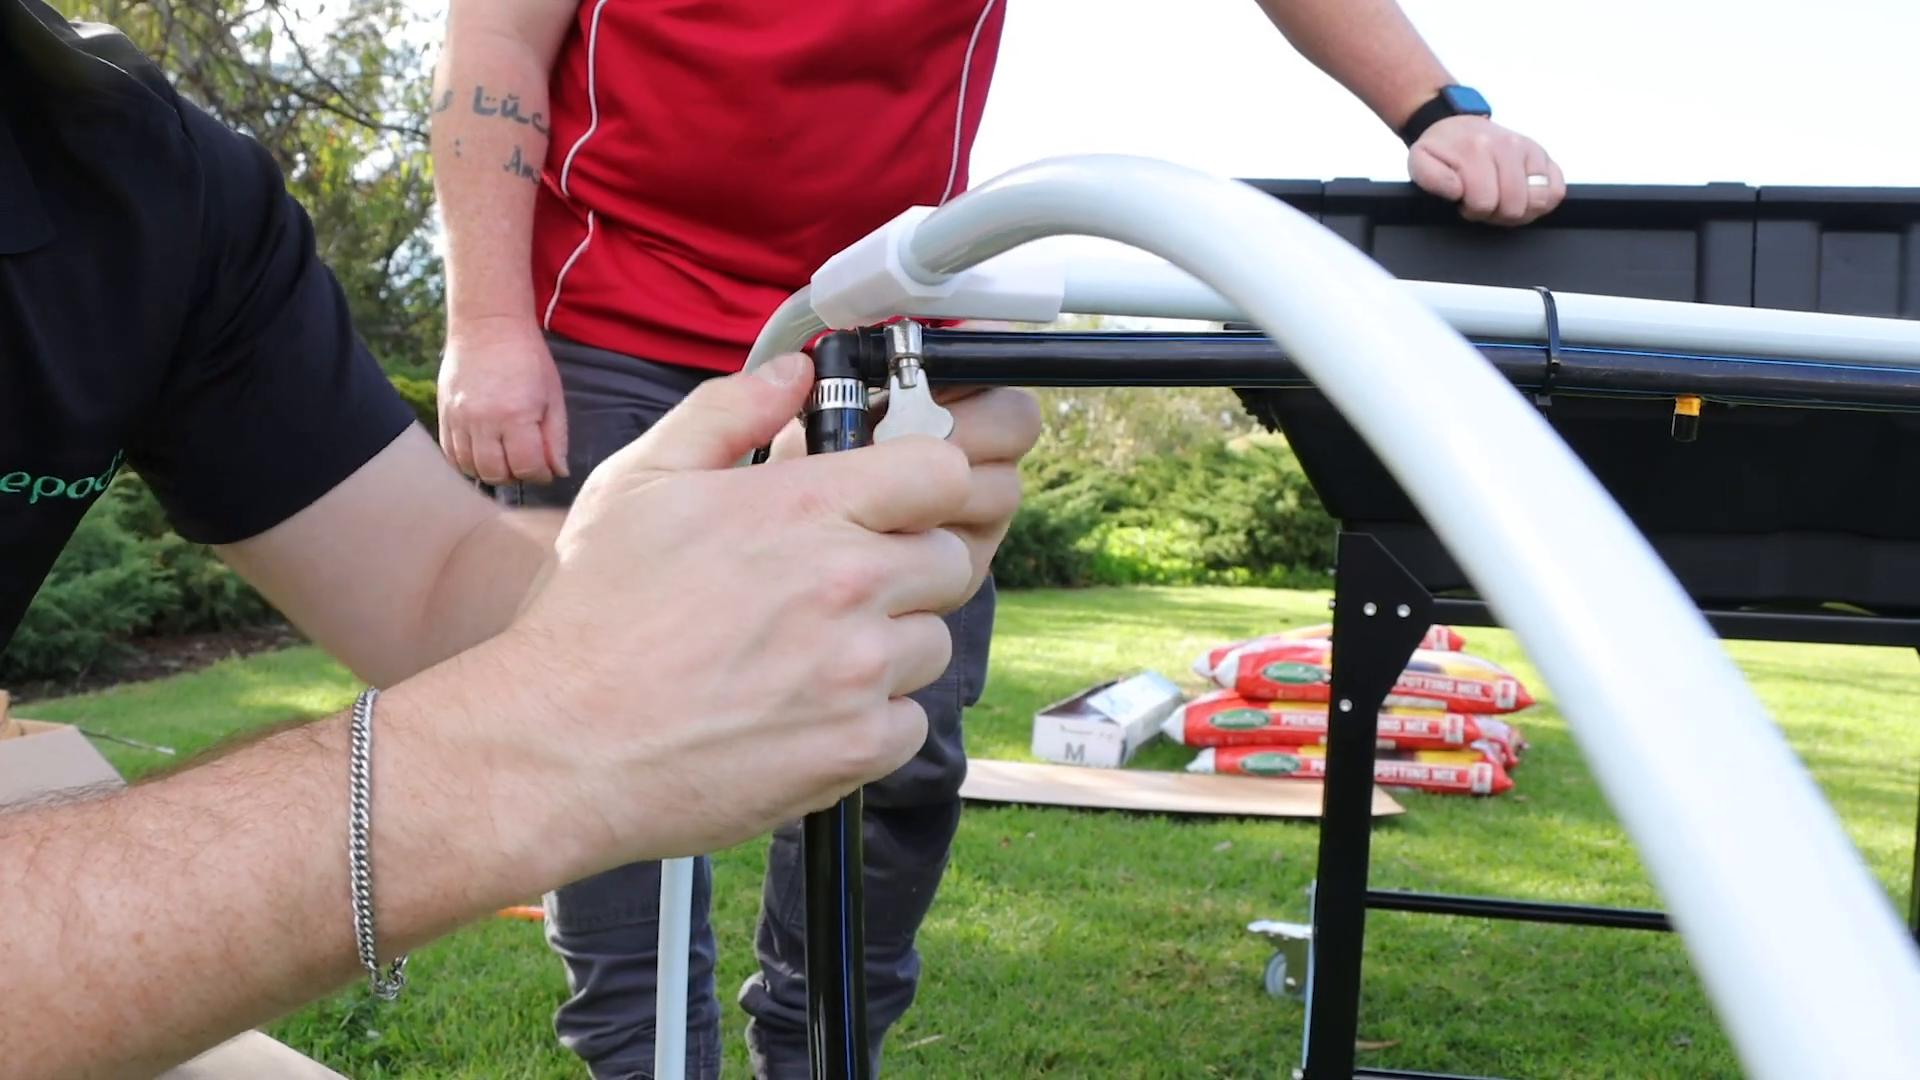
Step 7: Install the Irrigator
Next, set up the irrigator. Inside the mesh components box, you will find zip ties. Use these to secure the sprayer over the top, ensuring the hose connection hangs down appropriately. Tighten the clip to prevent any disconnections during use.
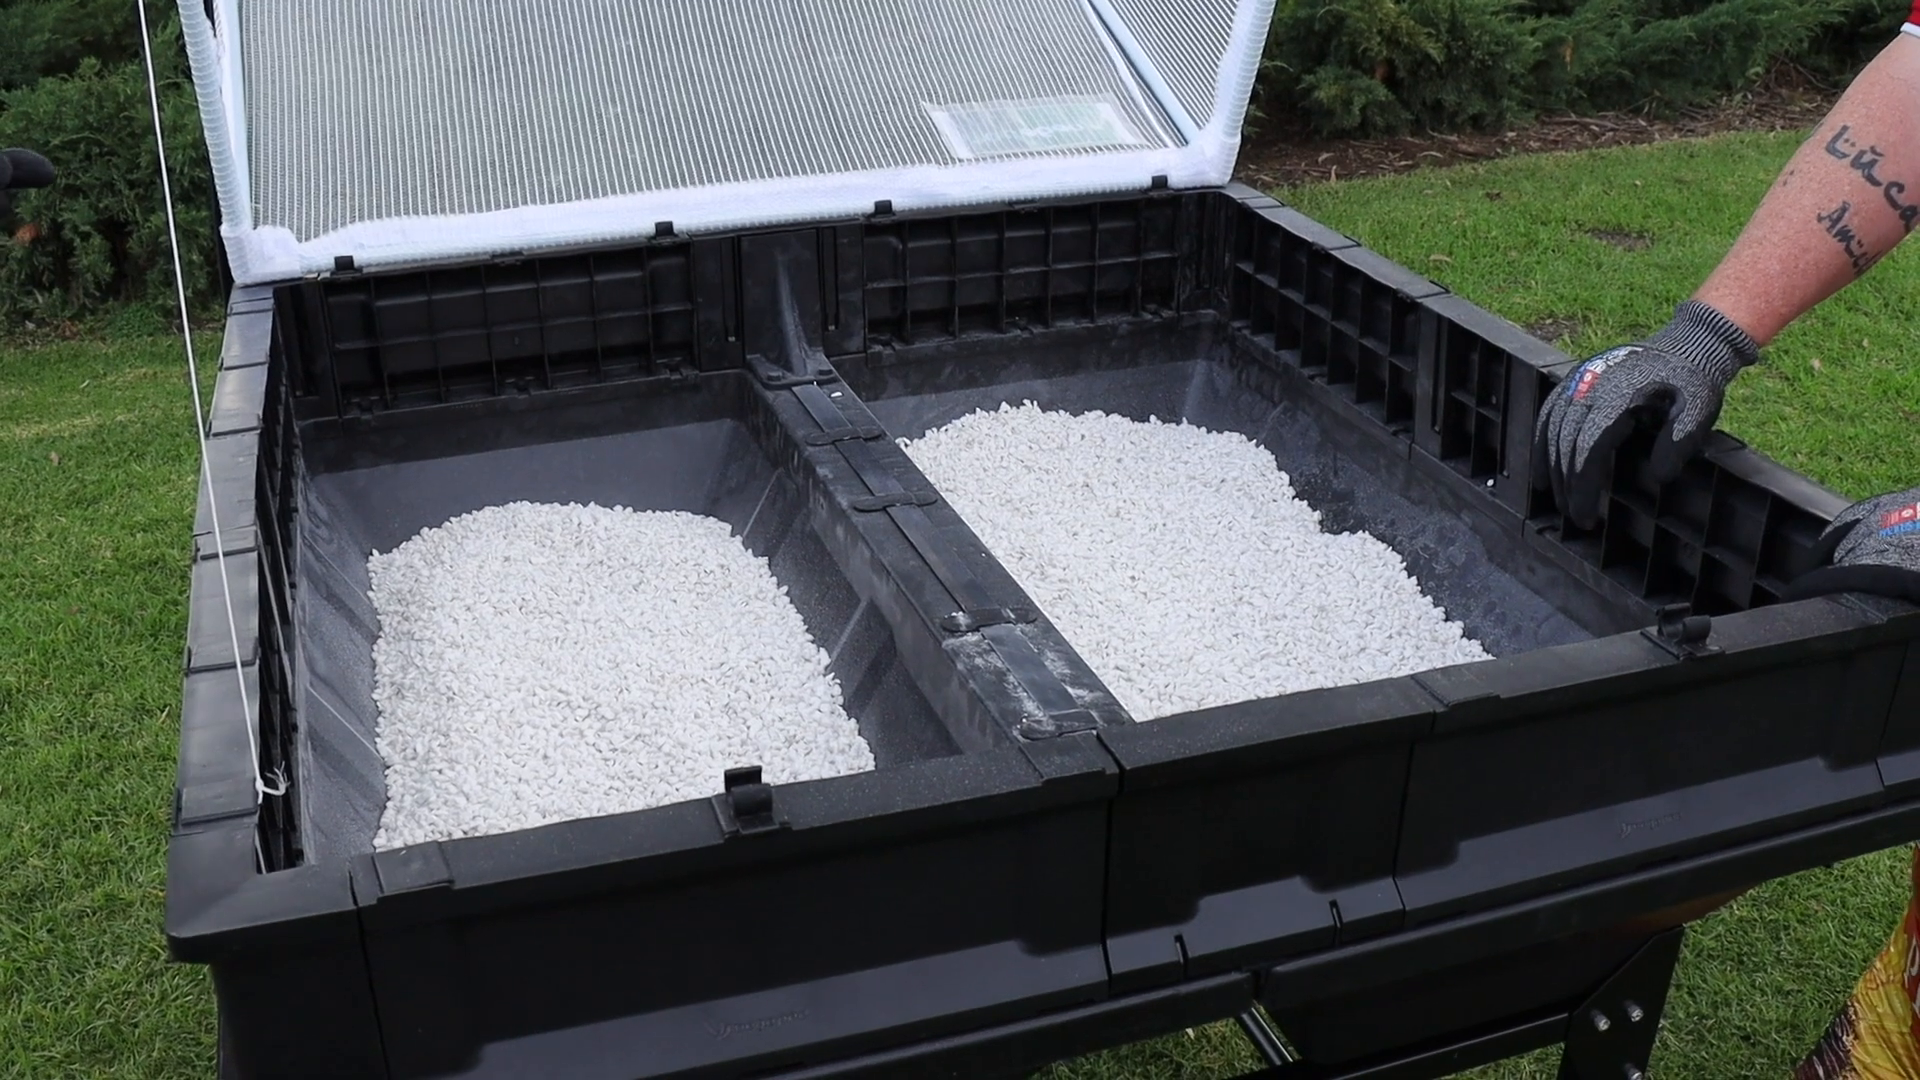
Step 8: Prepare the Soil Mix
Now that the pod is assembled, it’s time to prepare the soil. Begin by adding about 20L of perlite over the wicking trays. This will enhance water retention and further extend the self-watering capability. Please note, you should be wearing gloves and a mask when handling perlite - this is not something you want to inhale.
Following that, add high-quality potting soil. This is crucial as it will recycle nutrients effectively. The soil can last up to five years, just needing occasional top-ups with nutrients.
Step 9: Choose Your Vegetables
With the pod ready, it's time to select your plants. Choose a variety of vegetables that are suitable for the current season. For the best results, consider the depth of the soil. Shallow-rooted plants, like lettuce and spinach, are perfect for the center, while deeper-rooted vegetables can be planted on the sides.
Remember to maintain proper spacing to prevent overcrowding, which can lead to poor growth.
Step 10: Plant Your Vegetables
Now that your soil is prepared and your plants are selected, it’s time to plant. Carefully place the plants into the soil, ensuring they are adequately spaced. Water them in well to help them settle into their new environment.
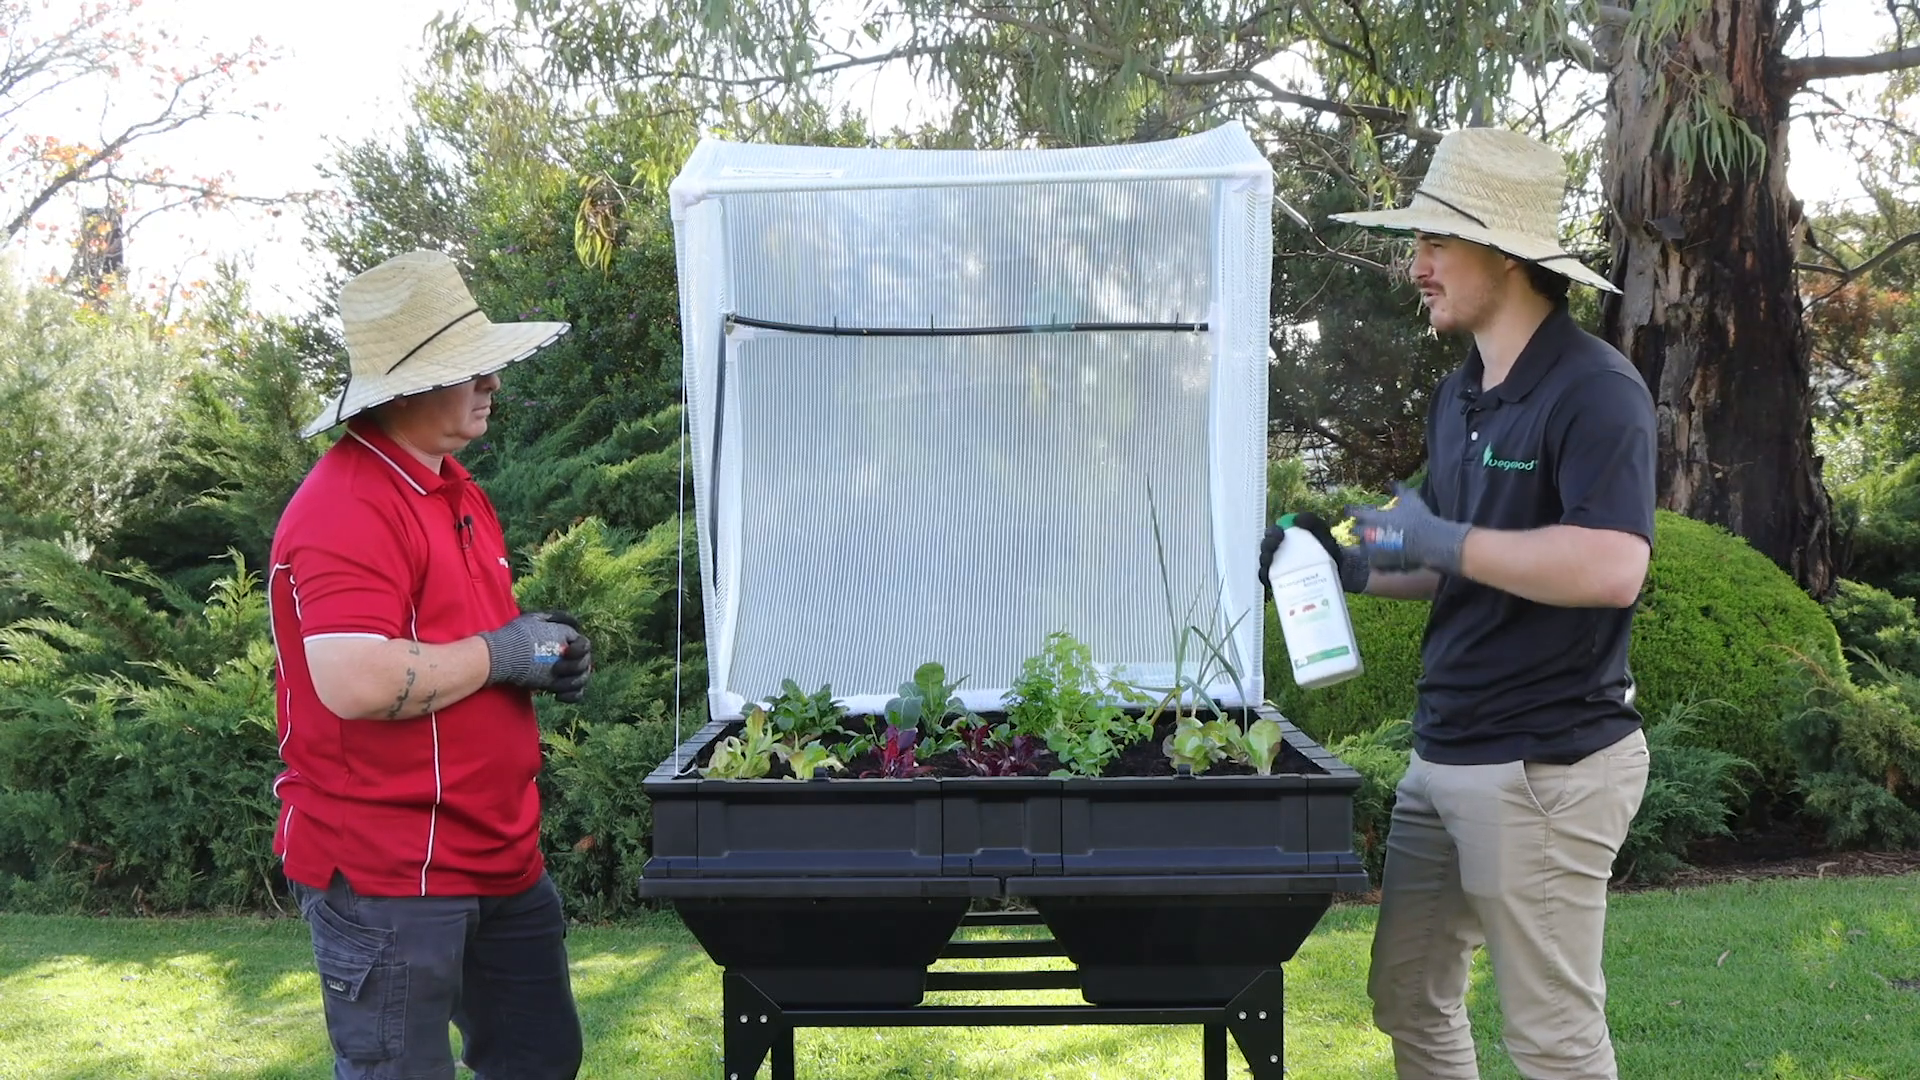
Step 11: Watering and Maintenance
After planting, it’s crucial to water the plants thoroughly. The wicking system will take over after about a week to a week and a half, allowing the roots to grow down into the reservoir below.
For ongoing maintenance, consider using a commercial-grade fertiliser to boost nutrients in the soil. This can be applied at the beginning and end of the growing season to ensure your plants receive the necessary nutrients.
Conclusion
Assembling and planting your Vegepod is a straightforward process that can lead to a bountiful harvest. With its self-watering feature and protective cover, you'll find that vegetable gardening is not only easier but also more rewarding. By following these steps, you'll be well on your way to enjoying fresh home-grown vegetables in no time!