- Contact Us
-
Your location
Pialba QLD 4655
Your nearest store is
Hervey Bay
-
Products
Our products
Patio & Outdoor Living See all
Louvre Lighting Outdoor BlindsOutdoor KitchensAll Patio & Outdoor LivingGarages, Sheds & Shed Storage See all
Cyclonic Sheds Flat Roof Sheds & Garages Gable Roof Sheds & GaragesIndustrial & Rural ShedsUmbra Awning Sheds All Garages, Sheds & Shed StorageFencing, Gates & Screening See all
All Fencing, Gates & ScreeningGift CardsMining Outdoor KitchensLawn & Garden See all
All Lawn & GardenSale Clearance All Products - Specials
- Stores
-
About
Stratco is one of the largest producers and marketers of quality building and home improvement products in Australia with a network of stores throughout the country.
- Trade
- Specifiers
HowTo Start Your Good Neighbour® Gate Project
Installing a gate can enhance your property’s security and curb appeal. In this guide, we will explore the process of starting your gate project, and installing a Good Neighbour® Gate, focusing on the essential steps, materials needed, and tips for a successful installation.
Get Your Gate Project Started - Explore Gate Options and Features
Stratco offers a variety of gates, each with their own unique style and features. From our Good Neighbour® gate range made with quality COLORBOND® steel to stylish slat-styled gates made with aluminium slats, Stratco has a gate to suit your unique needs. To get started, browse some of your options for a new gate below or in-store at your local Stratco. When deciding on your gate, take into account what hinges you'll need, how you want to lock the gate, whether that's with a padlock, or a gate key lock.
Gate Options Available At Your Local Stratco
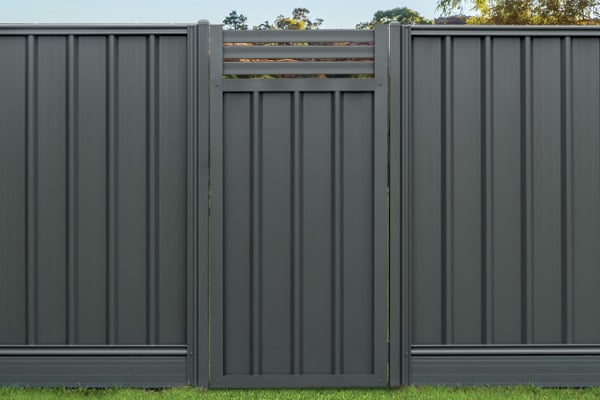
Stratco has a wide range of Colorbond Good Neighbour® gates. Single, double, or sliding gates are available in several profiles, including Superdek, Wavelok, CGI, Smartspan, and CGI Mini. The Good Neighbour® gate is a simple DIY project and can be paired with your choice of gate hardware with various latches, padbolts, and hinges on offer. Finish your new Good Neighbour® gate off by adding a slat or lattice fence top extension, for added privacy and security.
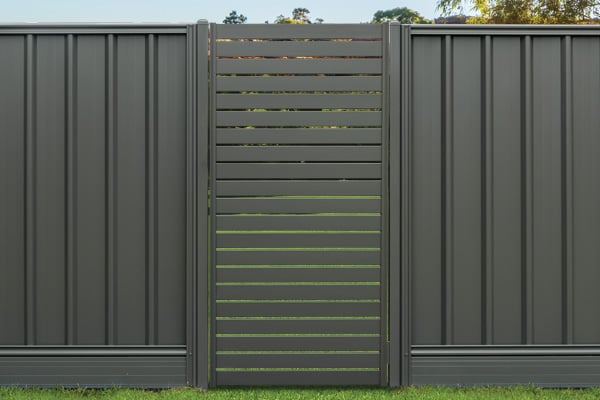
Slat fencing and gates offer a modern and stylish take on standard fencing options. Stratco offers multiple slat gate options, including ready-to-go kits you can DIY or have installed by a professional. These aluminium slats can be cut to size if you're after a non-standard-sized gate to suit your project. Arranged vertically or horizontally, slat gates turn your boring old gate into a visually appealing feature.
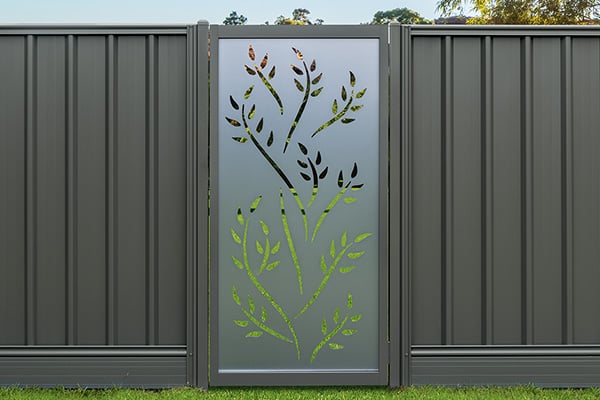
Alumaluxe screen gate kits are custom-made gates featuring aluminium decorative screens to create a stunning gate that pairs with Good Neighbour® fencing or other decorative screening panels. Specify your required width, height, design, and colours, and you'll receive a fully assembled gate. Alumaluxe screen gates are available in various designs and are supplied fully assembled for a simple DIY installation.
Once you've selected the style of gate to suit your project, you can choose from a wide range of gate hardware. Stratco offers gate latches, soft-close and auto-close hinges, key locks, and more.
Installing Our Chosen Good Neighbour® Gate
For the purpose of this HowTo guide, we've selected to install a Good Neighbour® gate in our Superdek profile.
Before diving into the installation process, it’s crucial to prepare adequately. Proper preparation ensures that your gate functions effectively and lasts for a long time. Here are the initial steps you need to take:
- Gather Necessary Tools and Safety Gear: Ensure you have safety gloves and goggles to protect yourself while handling steel and performing drilling tasks.
- Choose the Right Posts: For a single gate, opt for a SHS square post no smaller than 50x50mm. A 65mm SHS square fence post is recommended for double gates.
- Measure the Gap: Measure the distance between your posts accurately. This measurement is crucial for ordering the correct gate size, as it needs to account for latches and hinges.
Setting Up the Square Posts
The first major step in your gate installation involves setting up the square posts. This part is vital as the stability of your gate relies heavily on these posts.
- Concrete the Posts: Ensure that the posts are securely set in concrete. This will provide a solid foundation for your gate.
- Check for Straightness: Before proceeding, double-check that your fence posts are straight. Use a level to confirm that they are aligned correctly from top to bottom.
Installing the Good Neighbour® Gate: Step-by-Step
Once your posts are in place, it’s time to install the gate itself. This phase involves careful handling and precise measurements.
Attaching the Hinges
Begin by preparing your gate for hinge attachment. Follow these steps to ensure proper installation:
- Unwrap Your Gate: Start by unwrapping your Good Neighbour® gate. Ensure you have the correct size, typically a gate with a width of 820mm is for a gap of 860-870mm between posts. Stratco can custom make gates and components to suit your specific needs.
- Mark the Hinge Positions: Set your gate hinges 150mm in from the top and bottom of the gate. Ensure the hinge pins face upwards to prevent them from dropping out over time.
- Pre-drill Holes: Pre-drill holes for the screws that will hold the hinges in place.
- Secure the hinges: When ready, secure your hinges with wafer head screws, ensuring the hinges are facing the correct way, and if they have pins, ensuring they are upright to avoid them falling out.
Securing the Gate
With the hinges attached, it’s time to position and secure the gate:
- Use Spacers: To assist in positioning the gate, place spacers at the bottom. You can use timber chocks, cardboard or anything on-hand that isn't going to scratch your new gate.
- Check Alignment: Before fully securing the gate, check that it aligns well with the posts both horizontally and vertically.
- Screw the Gate in Place: Start by securing one screw at the top and one at the bottom. This will help you adjust as needed.
- Finish it off: Once you're happy with the placement of your gate, secure it with the rest of your wafer head screws.
Installing the Latch
The latch is a crucial component of your gate. For this project, we chose a D latch striker & handle. Here’s how to install it correctly:
- Determine Latch Height: Typically, the latch should be around 1200mm high from the ground. Mark this position on the gate.
- Attach the Striker: Begin by installing the striker on your Good Neighbour® gate. This will decide the height of the D latch, so you want to install this first. Screw this into the frame of the gate once you're happy with its position.
- Install the D Latch: Install the latch by ensuring it sits approximately 5mm above the striker plate to allow for smooth operation. Screw this into the corresponding fence post once you're happy with it's position.
Installing a Good Neighbour® Gate is a rewarding project that enhances your property’s functionality and appearance. By following the steps outlined in this guide, you can ensure a successful installation. Remember to prioritise safety, measure accurately, and explore the customisation options available from selecting colours, different gate hardware options and customising gate sizes to suit your needs. Whether you want a traditional Good Neighbour® gate made with COLORBOND® steel, or something modern and unique like a aluminium slat gate, Stratco can help you with a wide range of options available. Visit us in-store for more information, or request a free quote for your project today!